Showing posts with label Tatooine. Show all posts

Thursday, August 13, 2015

A couple more Landspeeders

It has been a while since I posted any of my Star Wars stuff - my lanspeeder race project has been on hold for the last couple years. However, I have 2 completed landspeeders sitting around, that just needed the final paint touch-ups and weathering... so I went and finished these up! These were very quick to paint - both got a simple 2-color paint scheme, and then I weathered them with Doc O'briens Weathering Powders to give them a dirty, desert-world appearance.

Oh yeah, the bases for these are from WotC Flash Speeders, I got a bunch back when they were cheap, and I've been using them for all my landspeeders.


Gian Sport Speeder
The first one is a modified Gian Speeder, from the old Galoob Action Fleet toy range. I removed the side-mounted guns to make it look more like a civilian vehicle. The original model was a long, 4-seat model, and I wanted this one to be a 2-seat racing vehicle. So... I got out my razor saw and cut out the center section with the rear seats, then glued and filled the gaps from the join. The end result looks a lot more sporty, and after a bit of sanding the join ended up being almost imperceptible. The driver next to it was a WotC Star Wars character, I cut off his hand and added a nice cool beverage. Thanks to my wife Debs on this one, she did most of the painting on the speeder and the driver.


"A-1 Deluxe Mobquet Floater"
The second one was a more complicated model. It was based on an old plastic toy car from the 1950s that I found in a flea market from a company called "Wannatoy." I noticed that it looked a bit like one of the speeders that can be briefly seen in some of the Mos Eisley background shots in Star Wars. It got my imagination going, and I decided to try to convert the toy into this speeder. A bit of internet research discovered that this vehicle was called an "A-1 Deluxe Mobquet Floater", and there were even the original blueprints available from when the built the prop! (see below) Isn't the internet amazing? Armed with the plans and a few photos, I set out to create my version, loosely based on the original.


I lost all my in-progress shots, but here is a picture of one of the same toys from ebay:


In the movie:


The bottom of the toy had holes for wheels, and I filled these with plasticard and putty. I then added the 2 seats inside in tandem, and a custom driver with a sculpted helmet, goggles, and breathing mask. The side engines were just plastic tubing, cut and glued onto the side rails. The dorsal fin in the back was a piece of plasticard, cut and pinned into the rear of the vehicle. The actual prop had 4 fins positioned like the rudders of a torpedo, but this looked like too much work, so I just stuck with the one.

The last, and most difficult bit was the canopy. The rear (opaque) section was made from bronze putty, formed around a marble and popped off when dry, to get the rounded shape. This I glued on and filled. The clear section was a blisterpack form from an oven-light bulb that I got at the hardware store - the packaging was just about the right size, and when carefully cut down it fit pretty closely. It was glued into place with 5-minute epoxy, and then I added the curved slats by using very thin plasticard strips, bent and glued again with 5-minute epoxy. I used epoxy because superglue would dry too fast to position correctly, and it would likely fog up the clear plastic. Final weathering touches and the "A-1 Deluxe Mobquet Floater" was complete! It is not an exact match, but it is close enough for me.

At this point I have 11 completed speeders, more than enough for the race.


Sunday, January 16, 2011

And Another Two!

 
I took a break from my regular job at Croc Games today to slap some paint on 2 old landspeeder conversions that have been sitting around unfinished for a long time.  They are the Rodian Runabout and the customized Flash Speeder.

I've posted the Rodian Runabout before, detailing how it was built.  I wasn't happy with the paint job on it, it was too dull and really did not bring out the best of the actual conversion, but I had spent so long on the darned thing that I had to put it away for a while for the sake of my sanity!  Well, it's been many months, so I came to the model today with a fresh outlook, and gave it a fresh coat of paint.  I stuck with a simple color-scheme inspired a bit by Greedo's costume in Star Wars (this is supposed to be his landspeeder.)  I also used a couple decals from an old japanese robot model for the hood and sides of the speeder, and then weathered the whole thing with Doc O'briens 'Gritty Yellow' weathering powder.  The standing Greedo miniature is from WotC's Star Wars range, and the seated Greedo in the landspeeder was a simple conversion using the head of one of the cheap 'common' Rodian miniatures.  A little putty and paint, and done!

Here are some more pictures:


The custom Flash Speeder is a conversion on the Flash Speeder toy from the Galoob Star Wars "Action Fleet" Micromachine range.  It is basically the same thing as the WotC Flash Speeder, but it is a tiny bit larger and has much better detailing -- and, it is made of hard plastic, better for conversions.  I wanted the speeder to look faster and a little more aerodynamic, so I cut the big awkward square engines off the sides and replaced them with 2 round turbine-style engines I made from some parts from my bits box.  The original toy had a cannon mounted on the back, and I removed this and cut the top off of the 'roll bar', then extended each side up about 1/3 of an inch higher, to make it look a bit like the tail fins of a jet-fighter (specifically the awesome F-22 Raptor.)  I added a bit of rolled up fabric to represent the convertible top being down.  Last, it was mounted on a base taken from a WotC Flash Speeder.  Construction complete, it got a simple paint job and some further weathering to finish. 


That's it for now!  Enjoy the pics!

--Fitz

Saturday, December 18, 2010

Clock Radio Building

Pretty much every miniature gamer I know has a few pieces of styrofoam packaging inserts stowed away in their closet, saving them for some future scenery project.  I don't know what it is about styrofoam packing inserts, but the make great buildings!  However, the problem with the white-styrofoam is that it is really fragile, and can't be painted or sealed with any kind of aerosol spray, so they always have a short life span.  Last year, I received a new clock radio for Christmas, and it came with a packing insert made out of a strange, brown, paper-mache material -- THIS kind of stuff.  The shape and texture of the insert looked interesting, like a very weathered sandstone or adobe.  What's more, it was fairly sturdy, so I decided I'd try an experiment and see how it worked as a building.  Unfortunately, I didn't  get any photos of the insert before I started the project, so you'll just have to imagine what it looked like beforehand -- I promise I'll take some in-progress photos next time!

Anyway, this building is supposed to be a power station, sort of like a gas station for Landspeeders. The insert had a lip around the bottom, which I trimmed off with a hobby knife.  There were also some holes and such, which I filled with putty.  Once I had the basic shape ready, I sprayed it all with a sand-texture spray (the stuff the use on outdoor furniture), but the results were underwhelming.  On top of the already-rough texture of the insert, you could hardly see the fine sand texture, so I need not have bothered.  After this dried, I added a bunch of mechanical components from my bits box.  This included parts from the "Platformer" power station and pumping station sets, plasticard, a door from a Galoob Action Fleet playset, and the tops of some toy missiles.  The roof of the building had a big hole, so I cut a big piece of plasticard and glued this in, to make a place for models to stand.  The junk pile around the back was, well, a bunch of junk.  I'm planning on putting a ladder on the back as well, once I find something suitable.  Then, the whole thing was glued down to a piece of 1/8 inch tempered hardboard for the base.  Then the whole thing was painted and the base was flocked in the usual manner.

Christmas is coming, and I'll on the lookout for some more interesting packing materials hiding in the boxes!


Monday, December 13, 2010

Two More Landspeeders!

OK, here's a couple more of the landspeeders that I've just finished off.


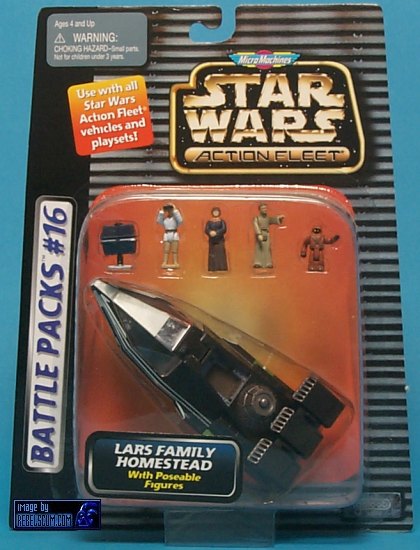
The White/Yellow landspeeder is the Sorosub V-35 'L-Kamino'.  It's based on the same toy as the "Lars Family Landspeeder" (posted earlier on the blog), but I've made a few modifications to give it a different feel.  Just like our cars come in different models (convertibles, hatchbacks, etc), I tried to make this a slightly different model of speeder, with a glamorous bubble canopy, larger side-mounted engines, and cargo room in the rear.  I removed the plastic canopy from the original model and filled in the gap on the top where the hinge was, and replaced the canopy with a clear-plastic bubble that I cut from a 'Woodland Scenics" Fir Tree 5-pack -- the packaging was a clear plastic clamshell and the top of each 'tree compartment' was the perfect size, once trimmed with some scissors.  The side engines are from the Micro-Machines Action Fleet "Gain Speeder", they were originally its guns that fired little toy rockets.  I think they look better as engine pods, with some little circular bits glued to the front and back.  The driver was s spare from one of the many WotC "Flash Speeders" that I dismantled to get their round bases, I cut off his head and replaced it with the head of a Wizkids 'Ghostfinder" miniature from their defunct Horrorclix game.  No model is safe in my collection!  It was then painted and dirtied up with weathering powders for that grungy "used universe" feel of Star Wars, particularly the vehicles you see on Tatooine.  I'm pleased with the way this one turned out, especially the wacky little 'El-Camino' style cargo area in the back!  (Thanks for the idea, Lyle!)

The Magenta landspeeder is based on a little keyring of "Anakin Skywalker's Airspeeder" from Attack of the Clones.  According to the Wookiepedia, it is a "Narglatch Airtech XJ-6 Airspeeder."  The keyring was part of the "Force Links" series of collectibles produced by Tiger Electronics around the time that the Clones movie came out, and I was able to pick up a couple very cheaply as they did not seem to be popular, probably due to their hideous yellow/orange/green color scheme!  Unfortunately, they were a little too small, probably 1/72 scale, so I needed to make the them look a little bigger to fit in with the rest.  Basically, I extended the rear engines with plasticard and putty by about 1/3 inch, added larger head-rests, and added some sort of frontal steering or propulsion fins alongside the engines.  These were inspired by the fins at the front of the Speeder Bikes, I figure that since landspeeders are using the same technology, they might have similar components.  These were just cut out of some simple plasticard shapes, and I added some thin plasticard rods to make them look like they are firmly attached.  With all these add-ons, the model finally looked the proper scale, albeit as a compact sports-car type vehicle.  The last bit was to give it a suitably racy paint job so that it will stand out from the crowd.  My wife really likes this one, and has claimed it as her speeder in the upcoming races!  (The other 'keyring speeder' is currently parked in the garage at Spaceport Speeders with a blown coolant regulator -- the repair parts are being shipped in from Mos Espa, but it's gonna be a while!)

Both of them were mounted on plastic bases torn off WotC "Flash Speeder" miniatures.

Looks like we have 10 completed speeders now, I need to do is get some suitably hazardous rocks and terrain built, and we'll be ready to race!

Sunday, December 12, 2010

Mushroom Buildings!

OK, so they are not really mushroom buildings, but they are made from mushroom containers...


For me, one of the most fun elements of building scenery is finding common, everyday items that can be turned into scenery and models.  This is one of those instances.


I was grocery shopping with my wife a few weeks back, and while perusing the 'fresh produce' isle I happened across a container of mushrooms.   I was struck by the unusual shape of their little plastic container, which when turned upside down reminded me of a building or bunker with structural supports along the walls.  So I purchased the mushrooms, and several salads later I was ready to turn their container into a Star Wars Tatooine-style building!

The problem with these containers is that they are made of very lightweight plastic, which would not hold up well to the abuses of most gamers, myself included.  However, since these are just vaccu-formed shapes, they can be easily used as molds for something more durable, like plaster.  I cut a slightly smaller shape out of styrofoam, so that the building would be lighter, put the shape into the container leaving about half an inch between the shape and the interior walls of the container, and then poured the plaster in.  The styrofoam floats on top the wet plaster, so I weighted the top down with some heavy books (wrapped in plastic, of course) and left it to dry.  An hour later the mold is done, and viola -- instant shape!  While the basic shape was still fresh from the mold, I cut the windows into the side (plaster is very easy to cut with a scalpel for a few hours after it comes out of the mold.)

(This photo shows the blue foam suspended in the plaster, for lightness.)
Next, I put a dome onto the top (half of a plastic Christmas ornament), and added an archway and door (I made made mine from putty, plasticard, and parts from my bits box, but there are LOTS of manufacturers who make similar sci-fi doors which would work great -- Armorcast, Scotia-Grendel, and Antenocitis Workshop all make some).  Once all these were put onto the basic shape, I filled in any gaps with some filler putty, and then textured the entire building with Herb Gundt's famous "Sandstorm Technique".  The chimney was a little part out of my bits box.  The whole thing was then mounted onto a piece of particle board and then painted and weathered.  Easy!

This was such an easy project, a welcome break after the long ordeal of Spaceport Speeders!  I've since discovered several other similar shapes at the same grocery store, all in the mushroom section (a slightly bigger container for the 'stuffing mushrooms', and a thinner, longer container that had the 'organic mushrooms'.  I'll be making a few more similar buildings with these in the future, once I get a little free time.  I've included a photo of some of the different shapes.

(some of the different shapes I found...)

Oh yeah, the grocery store is called Meijer, I think it is a chain all across the midwest.

Here are a couple more shots of different angles:

Front View

Rear view.
Overhead view.

Sunday, November 7, 2010

Spaceport Speeders


OK, it has been a loooong time since I've updated this blog.  I've not been slacking off, things just get really busy during the summer convention season, so I took a little break from the blog.  But I'm back, with lots of photos of a new project.

Most of my posts this far have been about a Star Wars Landspeeder Race I've been planning for some time.  Most of the Speeders are now done, so lately I've been getting some terrain ready to set the scene.  I expect the Landspeeder race to be a knock-down, drag-out affair, with lots of crashes and damages to the entrants, so we're going to need a 'repair shop'.  I present, "Spaceport Speeders!"  Right off the bat, I should send out a big thanks to Herb Gundt for lots of expert advice and support... thanks Herb!  This thing would probably look like a mess of popsicle sticks and and upside down paper cups if it were not for his help!  And a big thanks also to my wife Debs, for putting up with the eternal mess on the kitchen table!   ;)

Unfortunately, I did not take photos of this in-progress, there was just way too much going on, so I'll just briefly recount what wend into making it.  It's on a 1/8" thick tempered hardboard base, and the buildings are made from various found objects.  The big tech building is a plastic Kneenex dispenser I found at Goodwill for about $2, topped with half of a plastic sphere.  It has lots of tech-stuff added from my bits box, as well as a few pieces cut off of a Star Wars micro-machine toy set.  The garage was made from wood and half of a card shipping tube for the top.  The rear power shed was a little flower planter, and I added the door and top bits from the bits box.  The textured surface was made utilizing Herb Gundt's famous 'sandstorm technique,' then painted and weathered with Doc O'Brians Weathering Powders from Mico-Mark.  Hmm, what else -- the crane was from a micro-machine 'Pod Racer' toy set, and I added lots of details from the bits box and plastic tubing, so it wouldn't look like a toy.  I added lots of fun little details, you might be able to see some of them in the close-up images, like a little droid attendant in the window, landspeeder schematics and pin-up space babes stuck to the interior walls of the garage, and lots of tools and parts lying around the work yard.  Oh yeah, the sign says "Spaceport Speeders" in Aurebesh, the Star Wars 'galactic common' language, and there are fonts available for free online.  Unfortunately, I didn't think to light the interior of the garage until it was glued down, so now I'm on the hunt for a tiny, flat, and inexpensive battery-operated light that I can just glue to the ceiling behind the arch.  Anyone have any ideas?

And I just need to find a box suitable to store this darned thing in!

That's about it, just a few more pieces to go, and we're ready to race!

Here are direct links to all the images: